
Roads, rails, rivers and powerlines
A Rust map stores its roads, rails, rivers and powerlines as splines: a named chain of nodes with a width. The Paths tool is where you draw them, move their nodes, and apply the terrain work that makes a drawn line look like a real road: flattening the ground under it, painting its surface, and stamping the topology bits the game reads.
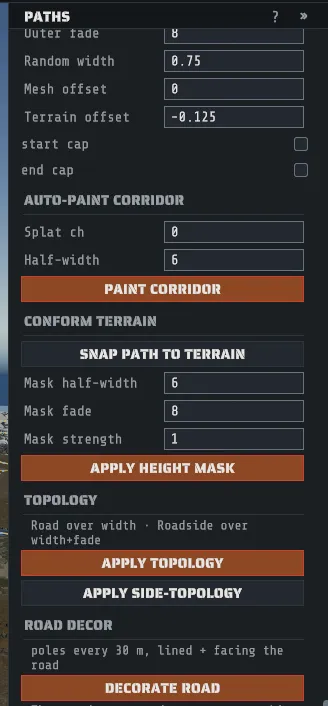
Press P or pick Paths on the tool rail. The status bar then reads:
LMB pick node · click terrain adds a node · Del removes · Esc clearsPath types
Section titled “Path types”+ PATH asks what kind of path to make. Each type is one of the kinds the game’s own generator builds, and a new path starts with every value the generator writes for that kind: width, padding and fade, the random width variation, the mesh and terrain offsets, the ground texture, the topology bit, the start and end flags and the hierarchy. Hover a type for a one-line description.
| Type | Named | Width | What the path becomes |
|---|---|---|---|
| Ring Road | Road N | 12 m | A main road like the generated ring road: gravel, hierarchy 0. Creator draws the road surface, and APPLY TOPOLOGY stamps Road and Roadside. |
| Road | Road N | 10 m | A side road like the roads the generator runs to monuments: gravel, hierarchy 1, with a road surface. |
| Trail | Road N | 4 m | A dirt trail, hierarchy 2. The game names trails Road too; the hierarchy is what makes it a trail, and like the game Creator draws no road surface for it. |
| Rail Ring | Rail N | 4 m | A main rail line like the generated rail loop, hierarchy 0. Creator draws the track, and the topology bits are Rail and Railside. |
| Rail Spur | Rail N | 4 m | A rail spur like the ones the generator runs to monuments, hierarchy 1. |
| Rail Siding | Rail N | 4 m | A siding beside a rail line, hierarchy 2. |
| River | River N | 8 m | A river. It widens downstream as the game’s rivers do, Creator draws a water ribbon whose width follows the width field, and the topology bits are River and Riverside. |
| Powerline | Powerline N | none | A powerline. It has no width and no ground work, and no road or rail surface is drawn for it; it is the group the game strings overhead wires along. |
The new path takes the next free number after the paths of the same name already on the map. Every row in the path list, and the inspector’s TYPE line, names the path’s type.
The name still matters. A Rust map has no type field: the game sorts its paths by the way the
name starts (Road, Rail, River, Powerline), and the hierarchy tells a ring road from a side
road from a trail. So if you rename a path, keep its first word, or it stops being that kind of path.
A path whose name says nothing (an older Path 1, say) takes its type from its topology bit if it
has one, and otherwise shows as Custom.
The vendor route. Rust’s traveling vendor drives only a closed road, and each bridge splits the
ring road at its deck. A Road N with a hierarchy of 3 is a vendor route: one closed road that runs
the ring across the decks for the vendor, and Rust counts it among its main roads. Creator writes it
when it generates a map whose ring road or island loop crosses a bridge, and writes it again from the
ring road and the bridges each time you save, so an edited ring never keeps an old one. The path list
names it Vendor route and shows it read only: it has no DEL, its inspector shows only its type
and node count, and its nodes cannot be moved, added or removed.
Draw one
Section titled “Draw one”- Click + PATH and pick a type. You get an empty path of that type, named for it and selected. Creating it is one undo step.
- Click the terrain to add a node. Each click appends one to the end of the path.
- Drag a node to move it. Nodes move horizontally, keeping their height; set a height in the Nodes section (see Editing nodes).
- Hold Ctrl and right-click near the line to insert a node into the nearest segment instead of appending to the end.
- Select a node and press Del to remove it. Esc clears the selection.
- Set width in meters. On a river this drives the water ribbon and updates as you type.
- Click SNAP PATH TO TERRAIN so every node sits on the ground. SNAP NODE n TO TERRAIN does only the selected one. Neither is offered on a guided path, whose nodes follow its guide, or on a live river, where the ground under each node is the bed the river cut, so a snap would sink it. The inspector says which in their place.
Every one of those is a single undo step, including a whole drag.
Profile: padding, fade, offsets and random width
Section titled “Profile: padding, fade, offsets and random width”Below width and spline, the inspector’s Profile section shows the seven other numbers the game reads for a path. A new path starts with the values the generator writes for its type, and each row is one undo step.
| Field | What it is |
|---|---|
| Inner padding | How far inside the path’s edge its bed starts to sink, in meters. |
| Inner fade | How far the bed takes, from there inward, to reach its full depth. |
| Outer padding | How far beyond the path’s edge the ground is leveled to the path. |
| Outer fade | How far beyond the outer padding the ground blends back into the land. |
| Random width | How much the width and depth vary along the path: 0.75 narrows it to three quarters in places, and 1 keeps it even. |
| Mesh offset | How far above or below the path’s line its surface is drawn. A generated river’s is -0.5 m. |
| Terrain offset | How far above or below the path’s line the ground under it sits. A negative number sinks the bed: a generated road’s is -0.125 m, a river’s -1.5 m. |
The line under the heading says what an edit does to the ground:
- On a live path the ground is settled to each change in the same undo step. Raise a river’s Outer fade and its banks are cut again at once; one Ctrl+Z puts the number and the ground back.
- On a path that is not live, the fields change the path’s data and not the ground. They are saved in the map with the path, and the ground follows them once you make the path live.
- A powerline, and a Custom path, write no ground at all: the fields are saved and nothing else changes.
A typed value is held to a range: 0 to 64 m for a padding, 0 to 256 m for a fade, 0 to 4 for the random width, and -50 to 50 m for an offset. A value typed outside that range is set to the nearest end of it, and a note says so. A value outside that range on a map you opened is shown and saved as it is until you type over it.
RESET PROFILE TO TYPE appears when any of the seven differs from the path type’s own values, and puts them all back in one undo step. It leaves the width and the two caps alone. A Custom path has no type to go back to.
Start cap and end cap
Section titled “Start cap and end cap”Two switches below the Profile rows, start cap and end cap, mark the path’s first and last node as a real end. They are the two end markers the map file keeps for every path, and the game reads them in three places:
- Its road and powerline decoration places an end object only at a marked end: a bus stop or a small substation where a road ends, a substation where a powerline ends.
- A rail’s marked end is left at the track’s own height. An unmarked end is snapped down to the ground.
- A rail whose start is marked eases its bed in over its first few nodes.
A road you draw starts with both off, as the generator leaves a road end that reaches no monument. On a generated map, a road end that meets a monument’s road connector has its cap on. A river and a powerline start with both on, and a rail spur with its start on.
Each switch is one undo step. On a live path the ground is settled in the same step, as for a Profile field. REVERSE PATH swaps the two with the node order, and SPLIT AT NODE n leaves the new joint uncapped on both halves.
Make the terrain agree with the path
Section titled “Make the terrain agree with the path”A drawn spline is only a line until you apply it to the ground. The inspector’s lower half does that, and all four actions share the corridor fields above them: mask half-width is how far either side of the line the effect reaches, mask fade is the graded band beyond that, and mask strength is how completely the terrain is pulled to the path.
| Action | What it writes |
|---|---|
| APPLY HEIGHT MASK | Pulls the terrain height to the path’s own height across the half-width, graded out over the fade. This is what makes a road sit in the landscape instead of on it. |
| PAINT CORRIDOR | Paints one ground texture channel along the line, using the splat ch (0 to 7) and half-width fields in the Auto-paint Corridor section. See Painting for what the channels are. |
| APPLY TOPOLOGY | Stamps the path’s main topology bit over the half-width. The inspector names the two bits it will use before you press it. |
| APPLY SIDE-TOPOLOGY | Stamps the side bit over the wider half-width plus fade band, which is the region the game treats as “beside a road”. |
The four actions write the terrain where the path is at the moment you press them, and leave no link: move a node afterwards and the flattened corridor, the painted strip and the topology stay where they were. They are the right tool for a one-off shape with your own half-width, fade and strength. For a road, rail or river that should keep its ground with it, make the path live instead.
Live paths: the ground follows the path
Section titled “Live paths: the ground follows the path”A live path keeps a link to the ground it shaped. Move a node, change its width or one of its Profile fields, or delete it, and the ground is put right in the same undo step: the new corridor is written and the ground the path used to shape is given back.
- Select a road, trail, rail or river. Its inspector has a Live section that reads NOT LIVE.
- Click MAKE LIVE AND APPLY. The ground under the path is remembered as it stands, then written.
- Edit the path as usual. Every edit and the ground change it causes are one undo step, so one Ctrl+Z puts both back.
A path whose ground is already shaped (a generated road, or one you applied by hand) has a second button, MAKE LIVE FROM HERE. It writes nothing: the ground as it stands is where the link begins. From then on, an edit writes only the part of the path it changes, a few nodes either side of the node you moved, and the rest is left exactly as it was found. The inspector counts those untouched nodes as NODES AS FOUND. One limit follows from that: where an edited part moves away from its old line, the old cut stays in the ground, because Creator never saw the ground that was there before it. Use MAKE LIVE AND APPLY on a path you drew yourself, and MAKE LIVE FROM HERE on one that came with its ground.
Screenshot: the Paths inspector’s Live section on a generated road just made live with MAKE LIVE FROM HERE. (
images/paths-live.png)
A live path does not use the corridor fields above. It writes what the game’s own generator writes for that type of path, so a live road looks like a generated one:
| Type | Height | Paint | Topology |
|---|---|---|---|
| Road, trail | The road is seated on the ground and the ground is graded to it, in the game’s two passes. | The path’s own ground texture over its width. | Road over the width, Roadside six cells either side. |
| Rail | The rail bed, graded in the game’s eight passes. | The path’s own ground texture. | Rail and Railside. |
| River | The bed is cut along the path, wider and deeper downstream, with banks that fade out. | Gravel along the bed. | River and Riverside. |
Three switches say which of those a live path writes: live height, live paint and live topology. Switch one off and that layer’s work is given back; the others stay.
A live river also writes water. A generated river is in the map’s water layer, which is what lets a player swim in it on a server. A river you make live with MAKE LIVE AND APPLY writes the same water the generator would, along the bed it has just cut, and has a fourth switch for it, live water. A river linked with MAKE LIVE FROM HERE starts with live water off, because that button writes nothing; switch it on to write its water.
Roads and rails a live river crosses. A generated river is in the ground before the roads are, so every road that meets one sits on a causeway there. A river you make live arrives after its roads and cuts its bed through them. A live river’s inspector names the roads and rails that cross it, and MAKE CROSSINGS LIVE links each one as it stands and re-seats it on the game’s causeway where it crosses, in one undo step. Away from the crossing those roads are left exactly as they were.
Features are written in the game’s order whatever order you made them in: rivers, then rails, then roads. A live road drawn across a live river gets the game’s causeway over it.
Hand edits are kept. Sculpt, paint or change topology inside a live path’s reach and the edit becomes part of the ground under the path. When the path moves away, the edit is still there. Where the path itself covers an edit (a bump under a road’s own carriageway, say), the path wins while it is there and the edit comes back when it leaves. RE-APPLY writes the path’s ground again at once.
BAKE keeps the ground exactly as it stands and drops the link: the path is an ordinary path again and its ground is ordinary ground.
| What you do to a live path | What happens to the link |
|---|---|
| Delete it | Its ground work is taken away with it, in the same undo step. BAKE first to keep the ground. |
| SPLIT AT NODE n | Both halves are live. |
| JOIN TO NEAREST PATH | The joined path is live if either path was. A road that is held up a ramp stays held. Joining a live path into a powerline or a Custom path is refused, because the joined path takes the selected path’s type and those write no ground: select the live path and join the other to it. |
| Rename it | The link is kept. |
| DUPLICATE PATH | The copy is an ordinary path. The link is not copied. |
New paths. The + PATH chooser has a switch, new paths are live. With it off (the default), a new path is an ordinary path until you make it live. With it on, a new road, rail or river is live from its first node, and the ground settles on every click. Creator remembers the choice.
Only roads, trails, rails and rivers can be live. A powerline writes no ground, and a Custom path has no type for the game’s rules to follow. A path that crosses a bridge the generator built cannot be made live either: the inspector names the deck, and the path stays an ordinary path. That holds after the map is saved and opened again, and a map opened after a generation is never held to that generation’s bridges.
TOOLS > Live Features… lists every live path and ramp on the map with its kind, its state and its size, and has SELECT, RE-APPLY and BAKE for each path. A ramp has SELECT RAMP, which opens it in the Ramp tool, and BAKE. The window is also where a link whose path has gone is baked or removed, and where a path reads changed outside Creator when the map was edited elsewhere: it stays live, and its next change keeps what was edited. The list follows undo and redo while the window is open.
Screenshot: the Live Features window listing a generated road made live, with the buttons on its row. (
images/live-features.png)
The line under a live path’s switches says what the last live action on that path did, or why it was refused. It is shown under that path only, and a map you open next starts with none.
Operations that rewrite the whole map (rotate, resize, resample and a generation) bake every live path first, inside their own undo step. A heightmap import and the land fixes bake the live paths that write height, and FILL THE HOLLOWS only those whose ground lies around the hollows it fills. A merge and a layer file import bake only the live paths whose ground they write: a merge those under its paste, on a layer it brings, and an import those that wrote a layer it replaces. Each says how many it baked. See Map tools.
A live path’s line is drawn in green, along the exact curve its ground is written on.
Guided roads, trails, rails and rivers
Section titled “Guided roads, trails, rails and rivers”A guided path is one you place by its two ends. Creator routes a road, a trail or a rail between them the way the game routes its own, around steep ground, water and monuments, and lays it as a live path. A river is laid from its source down to the sea; see Guided rivers below.
- Click + PATH and turn guided on. Creator remembers the choice, as it does new paths are live.
- Pick ROAD, RING ROAD, TRAIL or one of the rail types. No empty path is made: the panel reads GUIDED with the type, and the tool waits for a press.
- Press where the path starts, drag to where it ends, and release. While you drag, the line under the cursor is the route, and the status bar gives its length, its steepest grade and, for a rail, its tightest curve. Where a number is outside what the game’s own roads or rails keep to, the line says so.
- The release is one undo step: the path, its link and its ground together.
Esc or the right mouse button abandons a drag and changes nothing. The tool stays ready for the next path until you click STOP GUIDED or press Esc again. With guided on, a powerline type still starts an ordinary path that you draw by hand.
An end snaps to what it is dropped near: a monument’s road or rail connector, or a node of another road or rail. An end dropped on ground a road cannot use (too steep, under water, inside a monument) is moved to the nearest ground that it can, and the status bar says how far.
When the status bar reads that no route joins the two points, the ground between them is walled off. On a generated map the usual wall is a river: the rock formations along its banks block a route as a monument does, and they cut the map into pieces a route cannot leave. cross rocks, a switch the panel shows while the tool waits for a press, lets the route pass rock formations, which is how the game’s own roads were laid: before its rocks were. It starts off. Clear the rocks a route crosses afterwards. A monument blocks a route either way.
Guided rivers
Section titled “Guided rivers”With guided on, the RIVER type arms a river drag. Press where the river should meet the sea, drag inland to where it should start, and release. The panel has two modes.
MAKE THE LAND AGREE lays a river from the point under the cursor down to where you pressed. It keeps to low ground, and it cuts the bed so the river runs downhill all the way and ends below sea level. The status bar gives its length, its width and its deepest cut before you let go. This mode is Creator’s own: the game has no such rule. It is the mode the tool opens in on a map that has monuments.
FOLLOW THE LAND shows where the game would have put a river from the point under the cursor: the game’s own walk, downhill to the sea. The game keeps few of them. A river has to be about a kilometre long, reach open sea and stay clear of monuments, lakes and summits, and on a generated map fewer than one starting point in a thousand does all three. A course that is refused is drawn up to where it stops, and the status bar says why. find a source nearby, on at first, then tries the game’s own starting points within 60 m of the cursor and takes the one whose river ends nearest where you pressed.
Two switches go beyond the game’s own rules, and both start off:
- allow a shorter river, in FOLLOW THE LAND, lets the river be as short as about 110 m. On a small map nothing else can make one.
- allow a river near monuments lets the river pass 8 m from a monument, a lake or a summit, where the game keeps the river’s width plus 65 m clear. Its banks then reshape the ground beside it. On a generated map, MAKE THE LAND AGREE can use about a third to a half of the land with the switch off, and two thirds or more with it on.
A river never runs through a monument. Rock formations do not stop one: delete the rocks left standing in its bed.
A guided river is a live river. It writes its bed, its banks, its gravel, its River topology and its water, and MAKE CROSSINGS LIVE seats the roads it crosses on a causeway.
Changing a guided path
Section titled “Changing a guided path”Select a guided path and its guide points are drawn as crosses: its two ends, and any pins. A river’s two ends are its source and the point you pressed for its mouth.
- Drag a guide point to move it. The path is routed again and the ground follows, in one undo step. A click on a guide point only selects it: nothing is routed until the point is dragged.
- Ctrl+RMB on the terrain adds a pin, a point the route must pass through. Select a pin and press Del to take it out. A FOLLOW THE LAND river takes no pins: its course is the game’s, and the tool says so when you try. A guide that already has the most pins it takes says that too.
- A route that is still being searched for when you leave the Paths tool is not laid, and a note says so.
- The path’s nodes are not edited by hand while its guide drives them: the inspector shows no Nodes section for it, and a split or a join is refused. Its start cap and end cap follow the guide too, so the Profile section shows no switches for them. DETACH GUIDE drops the guide. The path stays live, the ground is not touched, and its nodes and caps are yours to edit.
A guided path is a live path in every other way. Its layer switches, RE-APPLY and BAKE work as above, and deleting it takes its ground work away.
Joining and copying
Section titled “Joining and copying”Two path actions, both one undo step:
- JOIN TO NEAREST PATH connects the selected path to the geometrically nearest other path, through whichever of its ends is closest. Holding Ctrl and clicking does the same thing in the viewport.
- DUPLICATE PATH clones the whole node shape as a new path, offset sideways, and selects the copy. It is the fastest way to get a second carriageway or a parallel rail.
Editing nodes
Section titled “Editing nodes”The Nodes section of the inspector works on the selected path’s nodes. Every action in it is a single undo step.
- SELECT ALL NODES, or Ctrl+A with the Paths tool active, selects every node of the path. Drag any one of them to move the whole path, press Del to remove them, or type a height. A plain click on one node goes back to selecting just that node.
- REVERSE PATH runs the path the other way, so its last node becomes its first.
- SPLIT AT NODE n appears when one inner node is selected. It cuts the path in two at that node:
the path keeps everything up to the node, and a new path takes the rest, named after the original
with
spliton the end. Both halves keep the split node, so the line does not move, and the new name starts the same way, so the new path keeps its type. - ADD NODE AT INDEX inserts a node at the number in Insert at index, where 0 is before the first node. It defaults to just after the selected node, or to the end of the path. A node between two others lands on the curve halfway between them; one at either end continues the end segment.
- Node X, Node Y and Node Z place one selected node exactly, in meters. With several nodes selected, Node Y sets all of their heights at once.
- Raise nodes by moves every selected node up by that many meters, or down with a negative number.
- SNAP TO NEAREST NODE appears when one node is selected. It moves that node onto the nearest node of any path, so the two paths meet at exactly the same point: a side road on the road it joins, a rail spur on its line. The line above the button names the node it will meet and how far away it is. Only the selected node moves. The node’s own two neighbors are never chosen, but any other node of its path can be, so a path’s last node can close a loop onto its first. On a live path the ground follows the node, and the node then takes the height the game’s rule for that path gives it.
Road decor
Section titled “Road decor”The decor section at the bottom of the inspector follows the selected path’s type: a river has DECORATE RIVER, a powerline has only the game’s own powerline rows, and every other path has DECORATE ROAD. A road also gets the game’s own road rows.
DECORATE ROAD lines the selected road with telephone poles every 30 m, one tower every eight poles, each yawed to face along the road and offset just clear of the carriageway. It reports what it placed under the button. It needs the game content loaded, because the poles are real Rust prefabs.
The overhead wires Creator draws follow the game’s own rule: a run of poles placed under one path, at least three in a row, sharing the same wire fitting. Poles you place yourself, including these, are not part of a path’s placement group, so no wires are strung between them. Powerline runs on a generated map do get their wires, because the generator places their poles as part of the path.
River decor
Section titled “River decor”DECORATE RIVER places the game’s own river objects along the selected river, the set a generated river gets:
- a source at the river’s first node, seated on the ground;
- a drain at its last node, seated on the ground;
- a sound every 10 m along the curve, at the river’s own height.
All of them are placed upright and carry the river’s name as their category, as the game’s generator places them. The drain and the sounds have no model of their own: they are the splash at the river’s mouth and the sound of the water, so find them in the hierarchy. The source also marks the ground around it as Decor topology, exactly as the game does when it places one.
The whole set, with the topology the source marks, is one undo step, and the line under the button counts what was placed. Press it once per river: a second press places a second set. It needs the game content loaded.
The game’s own road and powerline rows
Section titled “The game’s own road and powerline rows”A generation decorates roads and powerlines in a few steps of its own, each a row of the generator. A road (below DECORATE ROAD) or a powerline has one button per row, and each button runs that row’s own code on the selected path only, exactly as a generation runs it. While a row loads its prefabs the buttons are greyed and a line says so:
| Path | Button | What the row places |
|---|---|---|
| Road | ROAD SUBSTATIONS | a small power substation beside each marked end, 20 m out from the road’s edge |
| Road | TELEPHONE POLES | a climbable telephone pole every 25 m along one side |
| Road | ROAD OBJECTS | road signs and roadside props, and a bus stop at each marked end |
| Powerline | POWERLINE SUBSTATIONS | a big power substation at each end of the line |
| Powerline | TRANSMISSION TOWERS | a pylon every 75 m, with a platform pylon every third one |
The rows do more than place prefabs. A substation flattens and paints its pad and marks it as Monument topology, a bus stop raises and gravels the ground under it, and a pylon marks its feet. All of it, the prefabs and every change to the ground, is one undo step. The line under the buttons says what was placed and how much ground changed. A trail carries none of these rows, as in the game.
The seed. The rows draw their choices from the map’s seed. A map that carries a recipe (one Creator generated from a recipe) uses the recipe’s seed; any other map uses seed 1, the default. The line above the buttons names the seed and where it came from, and the same seed on the same path gives the same choices. Press each button once per path: a second press runs the row again over what the first placed.
What can differ from a generation of the same map:
- Each row walks only this path, so its choices are the ones the game would make if this were the map’s only road or powerline.
- A row reads the ground as it stands now. Marks that later rows leave in a generation (a bus stop’s Monument patch, for example) can already be there and refuse a pole the generation would have placed.
- A road’s end objects go only on an end with its cap switched on, as in a generation; a powerline’s substations go on both ends.
- The powerline rows do not see a generation’s monument and road corridors, which exist only while a map generates. The map’s own Monument and Road topology still keeps them off those places.
- A powerline you drew with a few far-apart nodes moves its end substation in bigger steps when the ground at an end does not fit it, because the game searches inward node by node.
Roadside wrecks are not offered: the game places them in one sweep over the whole map, not along one road. A row a launch switch turns off, or one that cannot run on its own in that launch, shows the reason in place of its button.
Where paths are saved
Section titled “Where paths are saved”Paths are a native part of the .map file, not a Creator addition, so they need no sidecar and no
server extension: any server and any other editor reads them. They are written back into the map
every time you save. Only a live path’s link to its ground
is kept in the sidecar. See The map file and the sidecar.